Done wrong, the consequences are real: letters that detach from facades, wiring faults that fail inspection, illumination that flickers within months, and manufacturer warranties voided because installation didn't follow UL specifications. Fixing those problems costs significantly more than getting qualified help from the start.
This guide covers everything involved in a professional channel letter installation — from mounting method selection to post-install validation — with specific attention to Arkansas permit requirements and the electrical credentials that make an installation code-compliant.
Key Takeaways
- Channel letter signs need professional installation — structural, electrical, and permit requirements all apply
- Three mounting methods: flush/direct mount, raceway mount, and backer panel, each suited to different building types
- Installation follows a fixed sequence: permits → site prep → mounting → electrical connections → validation
- Skipping post-install checks (illumination testing, sealing, level verification) is a leading cause of early sign failure
- A licensed sign company manages permits, fabrication, and installation from start to final inspection, contact us we look forward to working with you
What Is a Channel Letter Sign?
A channel letter sign is a three-dimensional sign where each letter or shape is individually fabricated as a hollow form. Unlike flat signs, every letter has physical depth and stands off the wall surface.
Key components:
- Aluminum return: The sidewall that creates letter depth, typically fabricated from .040 to .063 in. aluminum
- Acrylic or polycarbonate face: Transmits light through the front panel; acrylic is most common, polycarbonate where impact resistance matters
- Trim cap: Seals the edge where the face meets the return; UV-stable formulations are standard for outdoor use
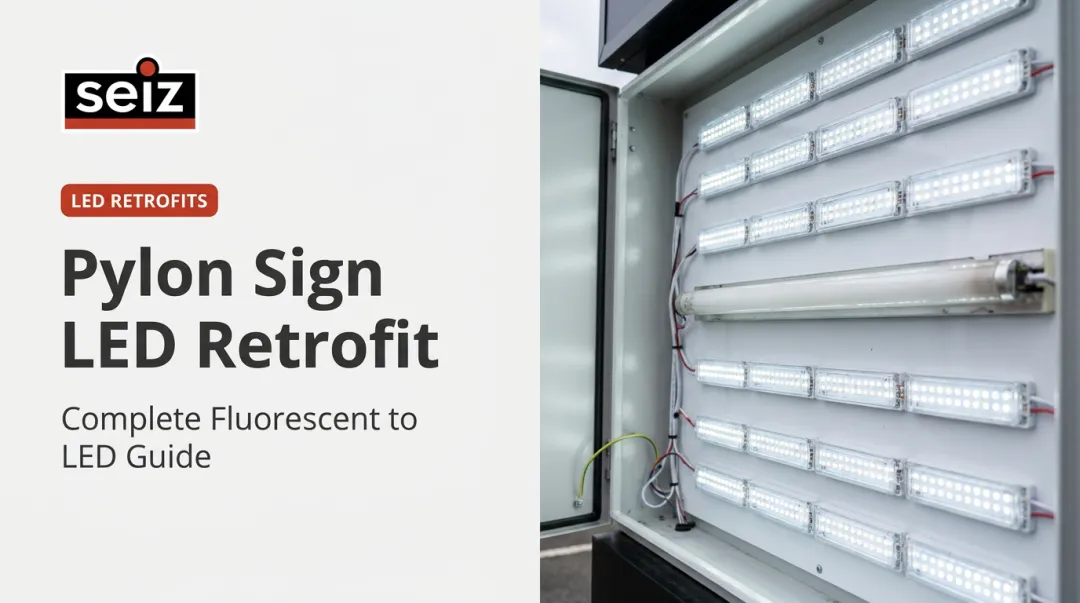
- LED modules: Mounted inside each letter to provide illumination
- Power supply/driver: Regulates voltage to the LEDs, typically housed in the raceway box or behind the wall
Illumination Types and How They Affect Installation
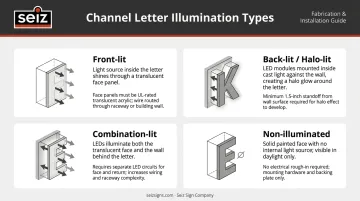
The illumination method determines several installation decisions before a single hole is drilled:
| Type | How It Works | Installation Note |
|---|---|---|
| Front-lit | LEDs illuminate through the acrylic face | Most common; standard wiring setup |
| Back-lit / halo-lit | Opaque face; light projects behind letters onto wall | Requires precise standoff spacing (~1.5 in.) for clean glow effect |
| Combination-lit | Both front and back illumination | Typically requires at least 3 in. letter depth; more wiring |
| Non-illuminated | Dimensional letters only | Same mounting process; no electrical component |
Channel Letter Sign Installation Guide
A complete installation moves through five stages: permitting, site preparation, mounting method selection and execution, electrical integration, and post-install validation. Skipping or rushing any stage creates problems that surface weeks or months later, often during weather events or power fluctuations when corrective work is most disruptive.
A straightforward raceway or backer mount typically takes one to two days. Complex direct mounts, multi-story installations, or projects requiring traffic management or crane equipment can extend to a week or more. Permitting lead times are separate from the physical installation timeline and should never be treated as an afterthought.
Prerequisites and Safety Considerations
Permits and approvals must be secured before fabrication begins. Arkansas sign codes are locally controlled, with requirements varying city by city and county by county. Hot Springs requires a permit before any sign is constructed, erected, or illuminated — and discovering a code violation after fabrication means costly modifications to a finished product.
Landlords and property managers may also require written approval independent of the municipal permit process. Seiz Sign Company's permit services include:
- City sign code research and zoning compliance review
- Overlay-district approvals (Malvern Avenue Overlay District in Hot Springs; Cantrell West Overlay District in Little Rock)
- Drawings and structural calculations
- Permit application submission and inspection scheduling statewide
Structural readiness requires assessing the wall surface for load-bearing capacity relative to sign weight. Different substrates require different anchoring:
- Brick/masonry — masonry anchors
- Wood framing — lag bolts
- Drywall/composite panels — toggle bolts or structural anchors
- Heavy signs on any substrate — supplemental support hardware may be required
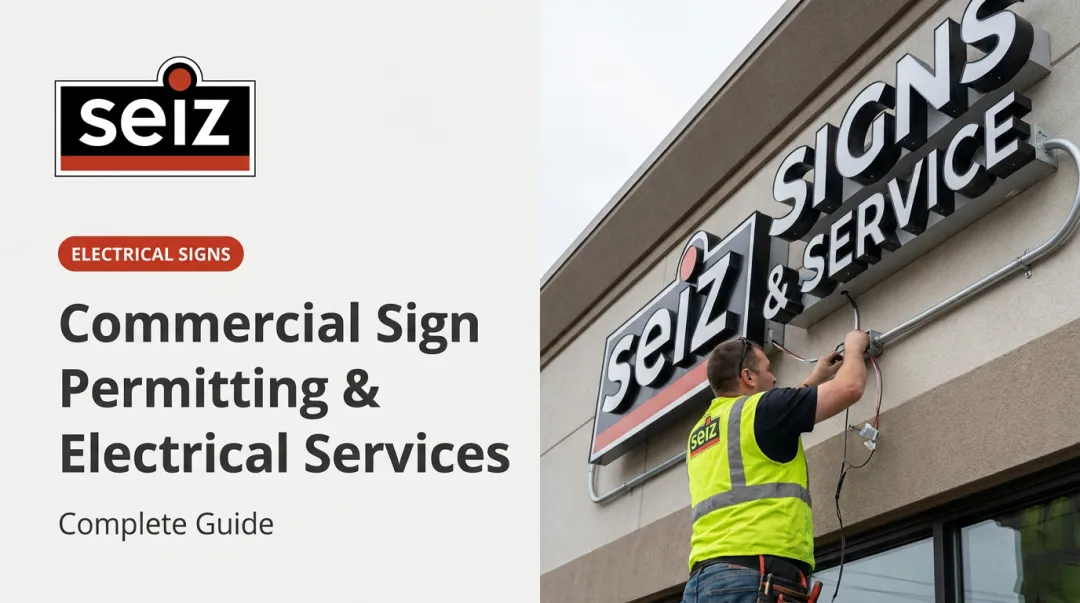
Licensed electrical credentials are required by law. Per ISA, U.S. electric signs must comply with NEC Article 600 and UL 48. Arkansas recognizes a Specialist Sign Electrician license category administered by the Board of Electrical Examiners, and installation of illuminated channel letters must be performed by or under the direct supervision of a licensed sign electrician. Seiz Sign Company employs multiple Licensed Sign Electricians — including General Manager Ronny Skipper, Project Manager Eric Schmitt, and Sales Executive Robert Manning — along with a master electrician on staff. Manning alone brings 42 years of industry experience to that credential.
Tools and Materials Required
Tools a professional installation crew brings:
- Power drill with masonry, wood, and metal bits
- Stud finder, measuring tape, chalk line, and level
- Paper or digital installation template from the sign fabricator
- Substrate-appropriate anchors and fasteners (non-corrosive)
- Exterior-grade silicone sealant
- Conduit and weatherproof wiring supplies
- Lift or ladder equipment rated for installation height
Materials to confirm before installation day:
- All letters, numbers, and logos present and undamaged
- Power supply/LED drivers correctly sized for the total LED load
- Raceway box or backer panel (if applicable), pre-painted to match the building façade
- Drainage provisions — weep holes sized to prevent water accumulation without creating pest entry points (1/4 in. is a common specification)
How to Install Channel Letters: Step-by-Step
Channel letter installation follows a defined sequence. Skipping site prep is a leading cause of rework, misalignment, and code failures.
Step 1 — Choose and prepare the mounting method
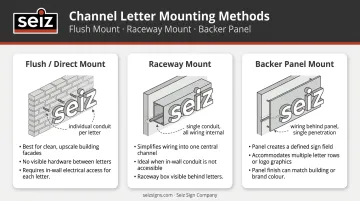
Three options exist, each with specific use cases:
- Flush/direct mount — Letters are individually mounted to the wall; wiring routes through individual wall penetrations. Cleanest appearance, most labor-intensive. Requires accessible electrical chase behind the wall.
- Raceway mount — Letters attach to a painted aluminum channel box that houses all wiring and the power supply. The box then mounts to the wall with minimal penetrations. Faster to install and service; ideal for high-turnover commercial properties or where landlords restrict wall penetrations. Paint the raceway to match the building façade.
- Backer panel mount — Letters mount to a solid flat panel, which then installs on the wall. Best for heavy signs, uneven substrates like brick, or multi-tenant properties requiring design uniformity. Allows contrasting backgrounds.
Step 2 — Site layout and marking
Use the sign fabricator's paper installation template to mark exact letter positions and all drilling points on the wall. Confirm the layout is level, centered, and within the approved sign area dimensions before any drilling begins.
Step 3 — Mount the raceway/backer or drill individual letter points
For raceway and backer installs, secure the base structure using fasteners appropriate for the wall substrate. Confirm it is plumb and level before attaching letters. For direct mount, drill all anchor holes and wiring penetrations per the template.
Step 4 — Attach letters and complete electrical connections
Secure each letter to the raceway, backer, or wall anchors. Connect low-voltage LED wiring from each letter to the power supply, routing all wiring in compliance with NEC guidelines. A licensed electrician must make the final connection to the building's power supply.
Step 5 — Seal and weatherproof
Apply silicone sealant to all wall penetrations, conduit entry points, and raceway/backer mounting points. Verify drainage holes are present and clear in every letter. For halo-lit signs, confirm standoff spacing between letter backs and the wall — approximately 1.5 in. is standard practice to produce a clean glow effect.
Post-Installation Checks and Validation
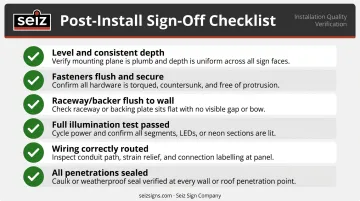
Before any sign goes into full operation, verify:
- Every letter is level and at consistent depth from the wall
- All fasteners are flush and secure; no letters rock or flex when touched
- Raceway or backer sits flush against the wall with no visible gaps
- Full illumination test — every LED module lights uniformly with no flickering or dark sections
- No visible wiring runs outside its intended routing
- All penetrations are sealed
Signs of a failed installation that must be corrected before sign-off:
- Uneven letter heights or visible conduit running across the facade
- Illumination inconsistencies between adjacent letters
- Unsealed penetrations that allow water ingress
Electric sign installations must be listed and installed per UL specifications, and the Authority Having Jurisdiction (AHJ) must approve the installation. Without that inspection, the installation lacks official approval — a liability that falls on the business owner, not the previous installer.
Common Installation Problems and Fixes
Misaligned or Uneven Letters
Problem: One or more letters appear crooked, off-center, or at different heights.
Likely cause: Template wasn't properly secured during marking, or anchor holes were drilled without verifying level at each point individually.
Fix: Recheck the original template against the approved layout. Minor misalignment may be correctable within oversized anchor holes. Significant errors require filling anchor holes with appropriate patching material, allowing full cure time, then re-drilling at the correct positions.
Electrical Failures or Flickering Illumination
Problem: Letters fail to illuminate, flicker intermittently, or show noticeably dimmer output than adjacent letters.
Likely causes:
- Loose wiring connections made during installation
- Undersized power supply for the total LED load
- LED module damage during mounting
- Incorrect voltage to specific letters on a daisy-chain wiring run
Fix: Test each letter's wiring connections individually before closing raceways or sealing wall penetrations. Verify power supply wattage meets or exceeds total LED draw. Replace damaged LED strips. If the fault traces back to the building's power supply connection, a licensed sign electrician should diagnose and correct it — not a general electrician unfamiliar with sign systems.
Pro Tips for Installing Channel Letter Signs Effectively
Secure permits before fabrication, not after. Arkansas municipalities and individual landlords have specific requirements covering sign dimensions, illumination type, and mounting style. A code violation discovered after manufacturing means costly changes to a finished product. Seiz Sign Company handles zoning, permit, and code research as part of project planning across Arkansas — before fabrication begins.
Work out illumination decisions at the design stage. Halo-lit letters require precise standoff spacing to produce a clean glow, and wall texture or color significantly affects the result.
One common pitfall: blue illumination on solid acrylic faces can appear washed out at night because the color reads similarly to dark sky. A dual-color vinyl film or combination-lit approach typically resolves this — and costs a fraction of what post-fabrication changes run.
Treat material selection as a long-term decision. Specify corrosion-resistant fasteners, UV-stable acrylic faces, and weatherproof paint for raceways — particularly given Arkansas's climate exposure. Lower-quality hardware degrades faster and requires re-installation of individual components, with repair costs typically erasing any upfront savings within a few years.
Conclusion
Channel letter sign installation quality directly determines how long the sign performs, how it weathers the elements, and whether it remains code-compliant. A sign installed without proper permitting, structural assessment, or licensed electrical work creates legal exposure and maintenance costs that dwarf the price of doing the job correctly upfront.
The most reliable approach is to engage a licensed, full-service sign company before selecting a design or mounting method, so that site conditions, permit requirements, building materials, and illumination choices are all accounted for before installation begins.
For businesses in Arkansas, Seiz Sign Company handles the full process: design, fabrication, permitting, licensed installation, and ongoing maintenance, with licensed sign electricians and a master electrician on staff for every project.
Frequently Asked Questions
How are channel letters installed?
Channel letters are installed using one of three methods: direct/flush mount (individually drilled into the wall), raceway mount (attached to an aluminum channel box), or backer panel mount (letters attached to a flat panel). Illuminated letters require electrical wiring to the building's power supply, completed by a licensed sign electrician.
What are the parts of a channel letter sign?
The main components are the aluminum return (the sidewall that creates 3D depth), the acrylic or polycarbonate face (the front panel), the trim cap (which frames the face edge), internal LED modules for illumination, and the power supply/driver unit that regulates voltage to the LEDs.
Do I need a permit to install a channel letter sign?
Most municipalities require a sign permit covering size, illumination type, and mounting method. Landlords may also require separate written approval. A professional sign company typically handles permit research, application submission, and inspection scheduling on the client's behalf.
How much does a channel letter sign cost?
Cost depends on letter count, size, mounting method, materials, illumination type, and local permit and labor fees. Channel letter signs are a long-term investment: material quality significantly affects total lifecycle cost and should not be the first place to cut budget.
How long does channel letter sign installation take?
A standard installation typically takes one to two days. Complex projects involving large signs, difficult substrates, multi-story buildings, or required traffic management may extend to a week or more. Permitting lead times are separate from the physical installation schedule and vary by municipality.
What is the difference between a channel letter sign and a box sign?
Channel letter signs are individually fabricated 3D letters that deliver a dimensional, architectural appearance. A box sign (cabinet sign) is a single enclosed cabinet with a translucent face panel. Channel letters offer more customization and a premium look; box signs are simpler and typically lower cost but less flexible in design.